
0%

Choosing a mirror involves more than finding a shape that suits the room. LED Lighted Mirrors combine reflection and built-in lighting, so their size, brightness, and placement can affect everyday routines. A soft, even glow may help with grooming, while harsh or poorly positioned light can create shadows around the face. Details matter.

This guide shares ten practical tips for comparing mirror styles and features. It considers color temperature, dimming controls, anti-fog functions, installation, and the mirror’s electrical requirements. Check product specifications carefully, since brightness and controls vary between models. Measure the wall, vanity, and available space before buying; a wide mirror can overwhelm a narrow sink, while a small one may leave useful areas dim. Also think about who will use it and when. Morning routines often benefit from clear, consistent light. A relaxing evening bathroom may call for a warmer tone.

No single mirror is right for every room. Some features sound useful but may add cost without improving your daily experience. Still, it is easy to overlook practical details when a product looks beautiful in a photograph. Consider the room’s existing lighting, ventilation, and installation conditions, and consult a qualified professional if electrical work is needed. These tips are intended to make comparison easier, not replace manufacturer guidance. A little careful checking can help you choose an LED mirror that fits both your space and your habits.
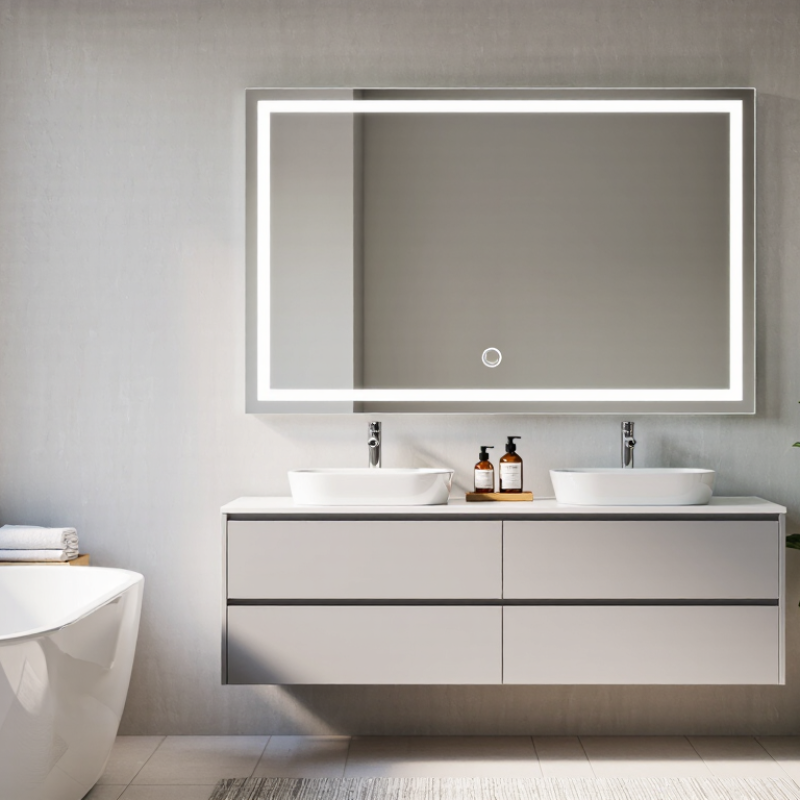
10 Tips for Choosing LED Lighted Mirrors

Understanding LED Lighted Mirror Types and Core Features

10 Tips for Choosing LED Lighted Mirrors
Understanding LED Lighted Mirror Types and Core Features

LED lighted mirrors usually provide front lighting, backlighting, or both. Front-lit models place LEDs around the glass, giving a clear view of skin and grooming details. Backlit mirrors cast a softer glow onto the wall. The effect differs. A combined design can offer task lighting and atmosphere, but check whether the LEDs illuminate your face evenly. Dark corners can be frustrating during shaving or makeup application.

Core features matter more than a long feature list. Adjustable brightness helps when moving from morning grooming to a dim evening bathroom. Color temperature affects how warm or cool the light appears; selectable settings are useful for checking makeup under different lighting. Look for a stated color rendering index (CRI), too. A higher CRI can make colors appear more natural. The U.S. Department of Energy reports that LED bulbs use at least 75% less energy and can last up to 25 times longer than incandescent bulbs. That comparison describes bulbs, not the lifespan of an entire mirror.

Check the edge. A built-in defogger can keep a central viewing area clear after a hot shower, though it may not cover the full glass. Confirm its heated area and control method. For a bathroom installation, review the mirror’s electrical specifications and suitability for its intended location; follow the manufacturer’s installation instructions. Dimming, touch controls, and memory settings sound convenient, but controls should still be easy to use with damp hands. Small details count.

LED Lighted Mirror Color-Temperature Options

Common LED lighting options include warm white at about 3000 K, neutral white at about 4000 K, and cool daylight at about 5000 K. Choose a tone that suits your bathroom and grooming needs; available settings vary by mirror.

Matching Mirror Size and Shape to Your Space

A lighted mirror should fit the vanity, not just the wall. A practical starting point is a mirror slightly narrower than the vanity, leaving a visible margin on each side. For a 36-inch vanity, a 32- to 34-inch mirror often feels balanced. Measure the faucet, backsplash, and nearby cabinet doors before choosing. Small details matter.

Shape changes the room’s feel. A wide rectangle suits a double sink and helps distribute light across both positions. A tall, narrow mirror can make a compact powder room feel less cramped, while a round mirror softens a space with straight tile lines. Check that the mirror’s illuminated area aligns with your face when standing naturally. A beautiful shape can still leave awkward shadows.

The U.S. Department of Energy reports that LEDs use at least 75% less energy and last up to 25 times longer than incandescent lighting; that efficiency makes lighted mirrors practical for daily use. Still, brightness and coverage depend on placement, not just energy use.

Measure twice. Then mark the mirror’s outline on the wall with painter’s tape. Living with that outline for a day can reveal a fit that looked right on paper but feels off beside the door or shower.

Evaluating Brightness, Color Temperature, and Light Quality

A lighted mirror should make daily tasks easier, not wash out your face. Check brightness in lumens, then consider the mirror’s size and your bathroom’s existing lights. A compact mirror may need less output than a wide one above a double sink. Numbers alone can mislead. If possible, stand in front of the mirror and look for even illumination across your forehead, cheeks, and chin. Strong lighting from behind the glass can still leave shadows under the eyes.

Color temperature, measured in kelvins, changes how skin and makeup appear. Warm light around 2700–3000K feels softer, while 3500–4000K often gives a more neutral view. Cooler light can feel crisp, but may make a bathroom seem stark. Look for a high color rendering index, ideally around 90 or higher, when accurate color matters. Check both.

Dimming is useful when bright morning grooming and late-night routines happen in the same room. A mirror with adjustable color temperature can help, though controls should be simple to use with damp hands. I once assumed brighter meant better; it did not. Harsh glare made small details harder to judge. Compare the mirror with the room lights on, and notice whether the light feels balanced rather than merely powerful.

Checking Installation Requirements and Electrical Safety

Before choosing an LED lighted mirror, measure the wall and check where the electrical supply sits. Compare the mirror’s dimensions with nearby cabinets, taps, and door swings. Leave room for airflow and future access to wiring. Some models plug into an outlet; others connect directly to household wiring. Confirm which setup the product requires before purchase. A neat-looking plan can still overlook a socket hidden behind the mirror.

Tip: Check the installation guide for voltage, mounting method, and bathroom suitability. If wiring needs to be altered, ask a qualified electrician to inspect the circuit and complete the work. Switch off power before any permitted inspection, and verify it is off with an appropriate tester. Never rely on a wall switch alone.

Check that the wall can support the mirror’s weight, especially if it has a metal frame or storage shelf. Tile and drywall may need suitable anchors, while studs can affect placement. Keep the mirror away from direct spray unless its instructions allow that location. Bathroom moisture matters. Look for clear guidance on damp-area use and required safety zones, then follow local electrical rules. Even a careful measurement can be slightly off; a paper template helps reveal problems before drilling.

Comparing Controls, Materials, and Long-Term Maintenance

Controls affect how an LED mirror feels during daily use. Touch buttons create a clean surface, but wet fingers can make them frustrating. Physical switches are easier to locate by feel, though they may collect dust around their edges. Dimming is useful for late-night routines, while adjustable color temperature helps when applying makeup or shaving. Try the controls in a showroom if possible. A button that looks intuitive on a product page may be hard to find in a dim bathroom.

Materials influence both appearance and upkeep. Aluminum frames resist moisture better than untreated wood, while a sealed wood finish can add warmth. Check that the mirror’s backing and edges are protected from humidity; peeling near the corners is difficult to ignore. I once chose a mirror with a glossy finish, then noticed every fingerprint under side lighting. A softer finish may be kinder. For maintenance, use a microfiber cloth and a mild cleaner, applied to the cloth rather than sprayed directly onto the mirror. Keep liquid away from switches and exposed seams. Dust the vents, if present, because trapped lint can limit airflow. Small habits matter. Still, cleaning instructions vary by coating, so keep the care sheet instead of assuming every glass surface can handle the same products.

10 Tips for Choosing LED Lighted Mirrors — Comparing Controls, Materials, and Long-Term Maintenance

Tip What to Compare Controls and Lighting Materials and Construction Long-Term Maintenance What to Check Before Buying
1 Choose a suitable light color. Color temperature affects how warm or cool the light appears. Look for a stated color temperature in kelvins. Adjustable color temperature can be useful for different tasks and times of day. Light color is determined by the LED system, not by the mirror glass itself. Keep the light settings consistent when comparing appearance over time; perceived color can vary with surrounding room lighting. Check whether the mirror offers one color setting or multiple selectable settings, and note the listed kelvin range.
2 Assess brightness and dimming. The right output depends on the room and intended use. Compare the stated light output and confirm whether dimming is available. Some touch controls require a press or hold to change brightness. A larger illuminated area does not automatically mean higher brightness; check the product’s specifications. Use the control as directed and avoid repeatedly switching power in ways that bypass the mirror’s intended settings. Confirm how brightness is adjusted and whether the selected setting is retained after power is turned off.
3 Test the control style for convenience. Controls may be touch-sensitive, switch-operated, or connected to a wall switch. Touch controls can keep the surface uncluttered; wall-switch operation can suit an existing lighting routine. Control behavior varies by model. Check that the control area is clearly marked and positioned where it can be reached after installation. Wipe control areas gently with a soft cloth. Do not spray cleaner directly onto electrical controls. Verify whether the mirror has a physical switch, touch control, or both, and whether an external wall switch is compatible.
4 Look for useful memory and defog functions. These features can simplify daily use. A memory function may restore a previous light setting, while a defogger warms a limited area of the mirror. Availability and operation differ. Defogging performance depends on the heating area and mirror design; it may not clear the entire surface at once. Use a defogger only as instructed. It is not a substitute for bathroom ventilation or removing heavy moisture. Check how much of the mirror the defogger covers, whether it switches off automatically, and how memory works after a power interruption.
5 Review the glass and reflective backing. Clear, even reflection is essential for everyday tasks. Lighting placement can affect shadows and glare; compare the illuminated layout as well as the light settings. Ask for details about glass thickness, edge finishing, and the protective backing. These specifications vary among products. Use a non-abrasive glass cleaner on a cloth. Avoid harsh chemicals and abrasive pads that can damage coatings or edges. Inspect product documentation for glass and backing details, and check the warranty for exclusions related to corrosion or edge damage.
6 Check the frame and exposed finishes. A frame can affect durability and cleaning effort. Frameless designs have fewer exposed trim surfaces; framed designs may provide extra protection at the edges, depending on construction. Compare the stated frame material and finish. Metal finishes and coated surfaces can respond differently to moisture and cleaning products. Dry splashes promptly and follow the manufacturer’s cleaning guidance for the specific frame finish. Confirm the frame material, finish-care instructions, and whether the edges are protected from routine bathroom moisture.
7 Match the mirror to the bathroom environment. Bathroom placement exposes products to humidity and occasional splashes. Electrical components and connections should be suitable for the intended installation location. Look for a stated moisture or ingress-protection rating when relevant; the rating applies only as specified in the product documentation. Ventilate the bathroom and keep water from pooling around electrical connections. Follow local electrical requirements. Check the installation location permitted by the manufacturer and use a qualified electrician where required.
8 Confirm the power and installation requirements. Wiring needs depend on the mirror and the room. Some mirrors are hardwired; others use a plug. Controls may behave differently depending on the power arrangement. Consider the mirror’s weight, mounting hardware, and the type of wall surface. Do not open or modify electrical components for routine care. Arrange repairs through a qualified professional. Review voltage, connection type, cable location, dimensions, weight, mounting instructions, and applicable local codes.
9 Consider serviceability and parts support. Long-term ownership is easier when repair options are clear. Ask whether the LED light source, driver, or control components can be serviced separately; designs differ. Construction that allows access to serviceable components may simplify repair, but it must be handled according to the instructions. Keep the installation guide and purchase details. Follow the stated warranty process rather than attempting electrical repairs yourself. Check warranty duration and coverage for the LED system, controls, glass, and frame, along with available replacement parts.
10 Plan for simple, regular cleaning. Gentle care helps preserve the glass and finish. Turn off the light before cleaning if the instructions recommend it, and keep liquids away from switches and electrical openings. Different glass coatings and frame finishes may require different cleaning methods. Use a soft, lint-free cloth and a suitable cleaner. Avoid abrasive pads, strong solvents, and excess liquid around edges. Read the care instructions before purchase and confirm that routine cleaning products you use are compatible with the mirror’s surfaces.

FAQS

What is the difference between front-lit and backlit LED mirrors?

Front-lit LEDs sit around the glass and help show grooming details clearly. Backlighting creates a softer glow on the wall. Combined models can provide both, but check whether light reaches your face evenly.

Why should I check brightness and color settings?

Adjustable brightness suits bright mornings and dim evenings. Selectable color temperatures help compare makeup under warmer or cooler light. Useful, not magic.

What does CRI tell me?

The color rendering index indicates how naturally colors may appear. A higher CRI can make skin and makeup tones look more accurate. Check the stated rating rather than guessing from appearance.

Will a defogger clear the whole mirror?

Not necessarily. Many defoggers heat only a central area. Check the heated area and control method; mist may remain near the edges.

How do I know whether the mirror fits my bathroom?

Measure the wall, cabinets, taps, and door swing. Check the electrical supply location and leave access to wiring. A paper template can reveal awkward placement before drilling. I could still overlook a hidden socket.

What electrical setup might an LED mirror need?

Some models plug into an outlet; others connect to household wiring. Confirm voltage, mounting instructions, and bathroom suitability in the installation guide. If wiring changes are needed, ask a qualified electrician.

How should I check the mounting surface?

Confirm that the wall can support the mirror’s weight, especially with a frame or shelf. Tile and drywall may need suitable anchors. Stud locations can affect placement.

Are touch controls and memory settings worth having?

They can be convenient, but controls should work with damp hands. Check moisture guidance and keep the mirror away from direct spray unless its instructions allow that location. Small details matter.

Do LED efficiency figures describe the whole mirror?

No. LED bulbs use at least 75% less energy and can last up to 25 times longer than incandescent bulbs, according to the article. Those comparisons describe bulbs, not an entire mirror.

Conclusion

Choosing the right LED Lighted Mirrors starts with understanding the available styles and features, such as built-in lighting, adjustable brightness, and anti-fog functions. Consider how the mirror’s size and shape will fit your room, complement nearby fixtures, and support your everyday routine. A well-proportioned mirror can improve both the appearance and usability of a bathroom or dressing area.

Before making a choice, compare brightness, color temperature, and light quality to find illumination that feels comfortable and helps you see details clearly. Check installation needs, available power connections, and electrical safety requirements for your space. Finally, review the controls, mirror materials, and expected maintenance so the product is convenient to use and easy to care for over time.

Ethan

Ethan

Ethan is a professional marketing specialist with a strong understanding of the company’s products, customers, and industry landscape. Through his work, he helps translate complex product capabilities into clear, practical, and valuable information for businesses and everyday users. With a......